results matching
results
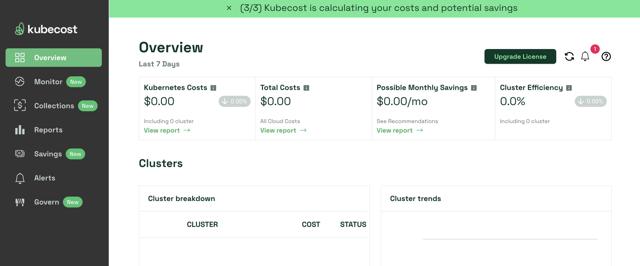
Kubecost is a real-time, automated cost monitoring tool for Kubernetes deployments. Kubecost automates Kubernetes cost accounting for internal and external expenses and performs usage analysis on those costs to determine how you can save money.
Kompose is a tool that makes it easier to convert Docker Compose files into Kubernetes resource deployments.
Containerization, for all its efficiencies, often brings additional overhead — especially when it comes to Kubernetes.
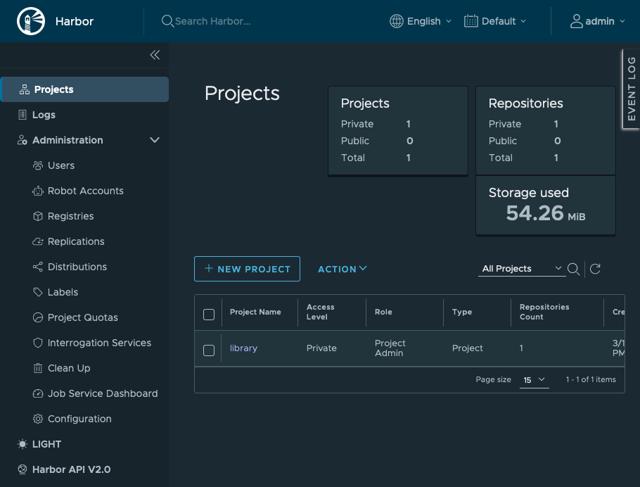
Harbor is an open-source and self-hosted registry for container images. With Harbor, you can securely store and access your own collection of Docker images without resorting to an external service, like Docker Hub.
Kubernetes and Nomad are both orchestration tools that each come with a compelling set of features.
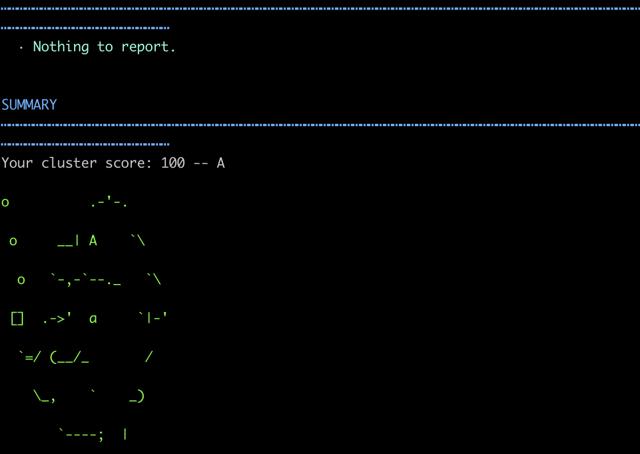
Popeye is an open-source read-only tool used from wherever a user has kubectl installed, using Kubernetes contexts defined in a kubeconfig file.
Kubernetes, through efficient container orchestration, has helped define how people think about managing application clusters. As a result, Kubernetes is now a widely adopted tool, with plenty of community support.
TOBS, short for The Observability Stack, is a pre-packaged distribution of monitoring tools and dashboard interfaces.
A few years ago the cloud was an idea; one that most pundits and businesses scoffed at.
If you are deploying your first Kubernetes cluster, it’s important to consider the security best practices that are available to keep your workload safe.
Linode Kubernetes Engine (LKE) is an open source container orchestration system that helps deploy and manage containerized applications.
Rook NFS allows remote hosts to mount filesystems over a network and interact with those filesystems as though they are mounted locally.
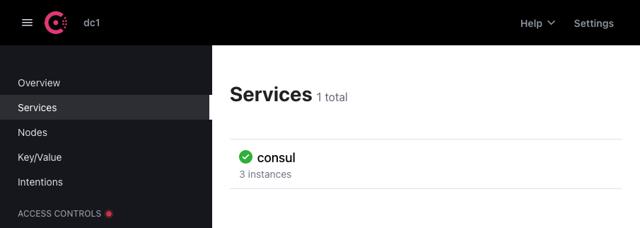
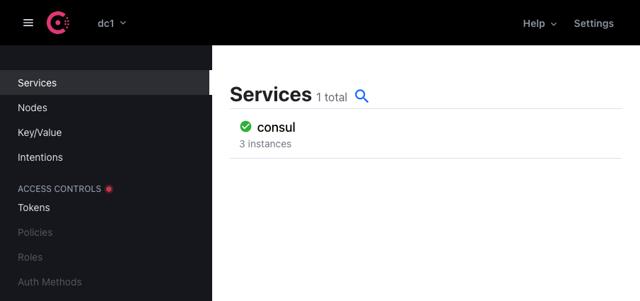
Consul is a service mesh offered by HashiCorp, with robust service discovery and diagnostic features for managing your application’s services.
Watch the Presentation: Register to watch this workshop, free of charge. Slide deck: Cloud Native Continuous Deployment with GitLab, Helm, and Linode Kubernetes Engine: Get Ready (Slide #10)
Watch the Presentation: Register to watch this workshop, free of charge. Slide deck: Cloud Native Continuous Deployment with GitLab, Helm, and Linode Kubernetes Engine: Installing metrics-server (Slide #152)
Watch the Presentation: Register to watch this workshop, free of charge. Slide deck: Cloud Native Continuous Deployment with GitLab, Helm, and Linode Kubernetes Engine: Prometheus and Grafana (Slide #163)
Watch the Presentation: Register to watch this workshop, free of charge. Slide deck: Cloud Native Continuous Deployment with GitLab, Helm, and Linode Kubernetes Engine: cert-manager (Slide #172)
Watch the Presentation: Register to watch this workshop, free of charge. Slide deck: Cloud Native Continuous Deployment with GitLab, Helm, and Linode Kubernetes Engine: CI/CD with GitLab (Slide #187)
Watch the Presentation: Register to watch this workshop, free of charge. Slide deck: Cloud Native Continuous Deployment with GitLab, Helm, and Linode Kubernetes Engine: Our Sample Application (Slide #24)
Watch the Presentation: Register to watch this workshop, free of charge. Slide deck: Cloud Native Continuous Deployment with GitLab, Helm, and Linode Kubernetes Engine: Deploying our LKE Cluster (Slide #51)
Watch the Presentation: Register to watch this workshop, free of charge. Slide deck: Cloud Native Continuous Deployment with GitLab, Helm, and Linode Kubernetes Engine: Quick Kubernetes review (Slide #62)
Watch the Presentation: Register to watch this workshop, free of charge. Slide deck: Cloud Native Continuous Deployment with GitLab, Helm, and Linode Kubernetes Engine: Accessing internal services (Slide #93)
Watch the Presentation: Register to watch this workshop, free of charge. Slide deck: Cloud Native Continuous Deployment with GitLab, Helm, and Linode Kubernetes Engine: DNS, Ingress, Metrics (Slide #100)
Watch the Presentation: Register to watch this workshop, free of charge. Slide deck: Cloud Native Continuous Deployment with GitLab, Helm, and Linode Kubernetes Engine: Managing stacks with Helm (Slide #107)
Watch the Presentation: Register to watch this workshop, free of charge. Slide deck: Cloud Native Continuous Deployment with GitLab, Helm, and Linode Kubernetes Engine: ExternalDNS (Slide #135)
Watch the Presentation: Register to watch this workshop, free of charge. Slide deck: Cloud Native Continuous Deployment with GitLab, Helm, and Linode Kubernetes Engine: Installing Traefik (Slide #143)
This series covers creating a continuous deployment pipeline within the cloud using LKE (Linode Kubernetes Engine), GitLab, and Helm.
What is Jenkins X?Jenkins X is CI/CD tool that automates the management of development environments and the promotion of new versions of applications between environments.
In this guide, you will deploy the Prometheus Operator to your Linode Kubernetes Engine (LKE) cluster using Helm, either as:
What is the Linode Block Storage CSI Driver?The Container Storage Interface (CSI) defines a standard that storage providers can use to expose block and file storage systems to container orchestration systems.
This guide will use an example Kubernetes Deployment and Service to demonstrate how to route external traffic to a Kubernetes application over HTTPS.
The Linode Cloud Controller Manager (CCM) provides a way for Kubernetes clusters to access additional Linode services.
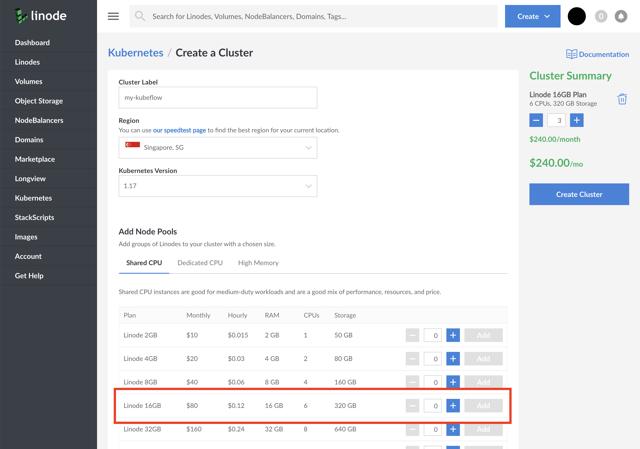
What is Kubeflow?Kubeflow is an excellent alternative for training and evaluating machine learning models in public and private clouds.
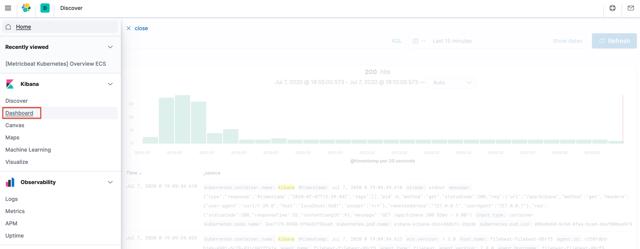
What is the Elastic Stack?The Elastic Stack is a collection of open source projects from Elastic that help collect and visualize a wide variety of data sources.
What is cert manager?Cert-manager is a Kubernetes add-on designed to assist with the creation and management of TLS certificates.
K3s is a lightweight, easy-to-install Kubernetes distribution. Built for the edge, K3s includes an embedded SQLite database as the default datastore and supports external datastore such as PostgreSQL, MySQL, and etcd.
Hosting a private Docker registry alongside your Kubernetes cluster allows you to securely manage your Docker images while also providing quick deployment of your apps.
What is Helm?Helm is a tool that assists with installing and managing applications on Kubernetes clusters.
Linode Kubernetes Engine (LKE) allows you to easily create, scale, and manage Kubernetes clusters to meet your application’s demands, reducing the often complicated cluster set-up process to just a few clicks.
In Kubernetes, an Ingress is an API object that manages the routing of external requests to one of the many possible internal services in a Kubernetes cluster.
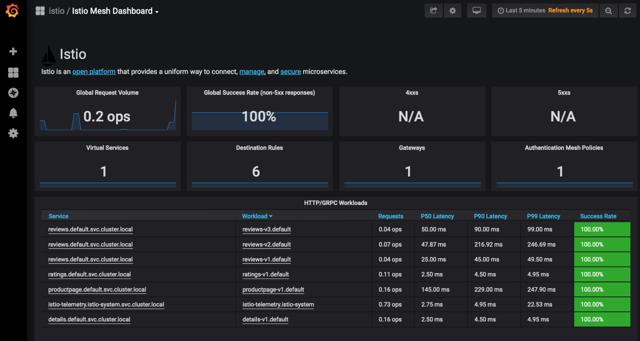
Istio is a service mesh, or a network of microservices, that can handle tasks such as load balancing, service-to-service authentication, monitoring, and more.
Linkerd 2 is an ultra lightweight service mesh that monitors, reports, and encrypts connections between Kubernetes services without disturbing the existing applications.
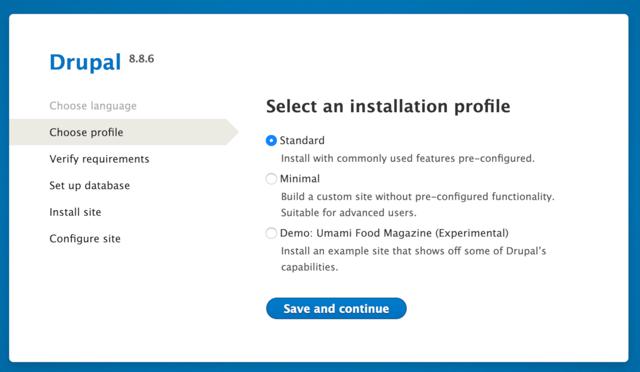
Drupal is an advanced and powerful content management framework, built on the PHP scripting language and supported by a database engine like MySQL.
What is Octant?Octant is a web application that talks to your Kubernetes clusters and provides an easy-to-read dashboard for the objects in your clusters.
What is KubernetesKubernetes is a container orchestration system that was initially designed by Google to help scale containerized applications in the cloud.
NoteThis is the first guide in the Beginner’s Guide to Kubernetes series that explains the major parts and concepts of Kubernetes.
NoteThis is the second guide in the Beginner’s Guide to Kubernetes series that explains the major parts and concepts of Kubernetes.
NoteThis is the third guide in the Beginner’s Guide to Kubernetes series that explains the major parts and concepts of Kubernetes.
NoteThis is the fourth guide in the Beginner’s Guide to Kubernetes series that explains the major parts and concepts of Kubernetes.
NoteThis is the fifth guide in the Beginner’s Guide to Kubernetes series that explains the major parts and concepts of Kubernetes.
Kubernetes, often referred to as k8s, is an open source container orchestration system that helps deploy and manage containerized applications.
Troubleshooting issues with Kubernetes can be complex, and it can be difficult to account for all the possible error conditions you may see.
IntroductionKubernetes introduces a whole new dictionary of terms; this guide contains some of the basic terms and their definitions as a reference.
Kubernetes and DockerKubernetes is a system that automates the deployment, scaling, and management of containerized applications.
The kubeadm tool is cloud agnostic and automates many of the tasks required to get a Kubernetes cluster up and running.
ImportantThis guide’s example instructions will create several billable resources on your Linode account. If you do not want to keep using the example cluster that you create, be sure to delete it when you have finished the guide.
What is Rancher?Rancher is a web application that provides an interactive and easy-to-use GUI for creating and managing Kubernetes clusters.
What is a Kubernetes Cluster?Kubernetes is an open source platform for managing containerized applications. If you use Docker for an application deployed on multiple Linodes, a Kubernetes cluster can manage your servers and deployments, including tasks such as scaling, deployment, and rolling upgrades.
What is Minio?Minio is an open source, S3 compatible object store that can be hosted on a Linode.
What is Kubernetes?Kubernetes is an open-source container management system that is based on Google Borg.
Bummer! The page you were looking for wasn't found. You can browse our articles or try searching.