Product docs and API reference are now on Akamai TechDocs.
Search product docs.
Search for “” in product docs.
Search API reference.
Search for “” in API reference.
Search Results
results matching
results
No Results
Filters
Self-host Appsmith with Docker Compose
Traducciones al EspañolEstamos traduciendo nuestros guías y tutoriales al Español. Es posible que usted esté viendo una traducción generada automáticamente. Estamos trabajando con traductores profesionales para verificar las traducciones de nuestro sitio web. Este proyecto es un trabajo en curso.
Appsmith is an open source framework for developing internal applications. With Appsmith, developers can quickly develop complex applications using drag-and-drop widgets for user interface design and JavaScript for application logic. Appsmith also simplifies connecting your application to a wide range of data sources, from REST APIs to databases directly.
In this tutorial, learn how to get started with Appsmith by deploying your own self-hosted instance with Docker. Start configuring, using, and managing your Appsmith instance to get the most out of it.
Before You Begin
Familiarize yourself with our Getting Started with Linode guide, and complete the steps for setting your Linode’s hostname and timezone.
This guide uses
sudowherever possible. Complete the sections of our How to Secure Your Server guide to create a standard user account, harden SSH access, and remove unnecessary network services.Update your system.
Debian and Ubuntu:
sudo apt update && sudo apt upgradeAlmaLinux, CentOS Stream (8 or later), Fedora, and Rocky Linux:
sudo dnf upgrade
sudo. If you’re not familiar with the sudo command, see the Users and Groups guide.What Is Appsmith?
Appsmith is an open source framework for building web-based applications via a visual, drag-and-drop interface. Especially designed with the development of internal applications in mind, Appsmith allows you to more quickly compose an application interface and get your application operational.
Appsmith allows you to connect drag-and-drop UI widgets to a wide range of data sources to make a full functioning application. Whether you access data via a REST API, GraphQL, or directly from a database, Appsmith is capable of mobilizing it in your new application.
From there, Appsmith uses JavaScript to control the logic within your application. In this way, it gives you a powerful blend of graphical application layout and design and code-first control of actions.
Appsmith vs Retool and Budibase
There are other tools that compete with Appsmith. So, how does it compare with them? Why use Appsmith over Retool or over Budibase?
Appsmith’s main advantage over Retool is its open source nature. Appsmith is distributed as an open source application that can be used and self-hosted freely. Retool, on the other hand, is proprietary. While Retool has a free tier, both its cloud-hosted and self-hosted offerings are limited if you are not on a paid plan.
Appsmith vs Budibase, on the other hand, comes down to emphasis and audience. Both are open source solutions. But Budibase aims to make application development completely visual. It is a “code optional” solution, with system administrators and other non-developer IT fields primarily in mind.
Appsmith, on the other hand, provides a solution to help developers build complex internal applications more quickly and easily. It provides a balance of graphical design and coded logic to simplify UI design without sacrificing application control.
How to Deploy Appsmith with Docker
The official method supported for deploying a self-hosted Appsmith instance is through Docker Compose. That is the method used here, with all the steps you need to get your own instance up and running.
Installing Docker
The first step is to install Docker and Docker Compose. Docker runs Appsmith, while Docker Compose organizes its component parts and ensures their installation and coordinated execution.
Install Docker using the steps outlined in one of the following guides, depending on your Linux distribution.
Debian and Ubuntu: Use our guide on How to Install and Use Docker on Ubuntu and Debian.
AlmaLinux, CentOS Stream, Fedora, and Rocky Linux: Use our guide on How to Install and Use Docker on CentOS and Fedora.
Install Docker Compose using your distribution’s package manager.
Debian and Ubuntu:
sudo apt install docker-compose-pluginAlmaLinux, CentOS Stream, Fedora, and Rocky Linux:
sudo dnf install docker-compose-plugin
Verify your Docker Compose installation. Your version may not match the one shown below, but you just want to make sure that you get a version response:
docker compose versionDocker Compose version v2.10.2
Downloading Appsmith
Once you have Docker and Docker Compose installed, you need to download the Docker Compose file for Appsmith. This file should, additionally, be downloaded into the directory you plan to run Appsmith from.
This series of commands creates a directory for Appsmith, moves into that directory, and downloads the Docker Compose file for Appsmith. Here, the Appsmith directory is created as a subdirectory of the current user’s home directory. Modify this to fit your needs:
mkdir ~/appsmith
cd ~/appsmith
curl -L https://bit.ly/3AQzII6 -o $PWD/docker-compose.yml
All subsequent commands in this tutorial assume you are operating in this Appsmith directory unless noted otherwise.
Running Appsmith
With the Docker Compose files for Appsmith downloaded, you can now start up Appsmith with the following command:
sudo docker compose up -d
With the initial run, Docker Compose starts by downloading the necessary image files for the Appsmith services. For this reason, the first time you run this command may take longer than subsequent times.
Docker Compose starts up the Appsmith services once it has finished with these initial downloads. Read on to the How to Start Using Appsmith section below to see it in action.
Stopping Appsmith
Once started, the Appsmith services continue running until either manually stopped or until the server is shut down. You can start the services back up anytime using the docker compose up -d command as seen in the section above.
Should you need to stop the Appsmith services manually, you can do so by running the following command:
sudo docker compose stop
How to Start Using Appsmith
Now that Appsmith is up and running, and you can access the dashboard by navigating to http://localhost in a web browser on the server.
However, doing so is often not feasible, especially not for numerous users. Likely, you want to be able to access the dashboard remotely.
You can do so by navigating to the Appsmith server’s URL, which may be an IP address, like 192.0.2.0. But first, you need to ensure that the server’s firewall provides external access to the HTTP port, port 80.
Debian and Ubuntu: Refer to our guide on How to Configure a Firewall with UFW.
AlmaLinux, CentOS Stream, Fedora, and Rocky Linux: Refer to our guide on Enabling and Configuring FirewallD on CentOS.
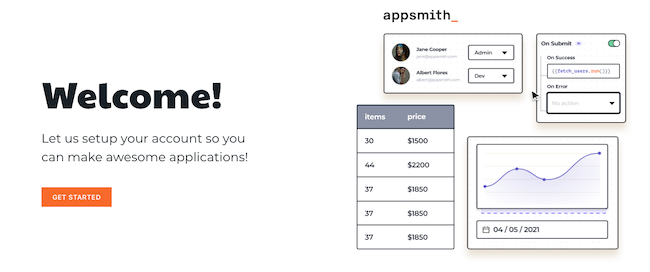
Having opened the port, navigate to the server’s URL/IP address, and you should be greeted by the Appsmith welcome page.
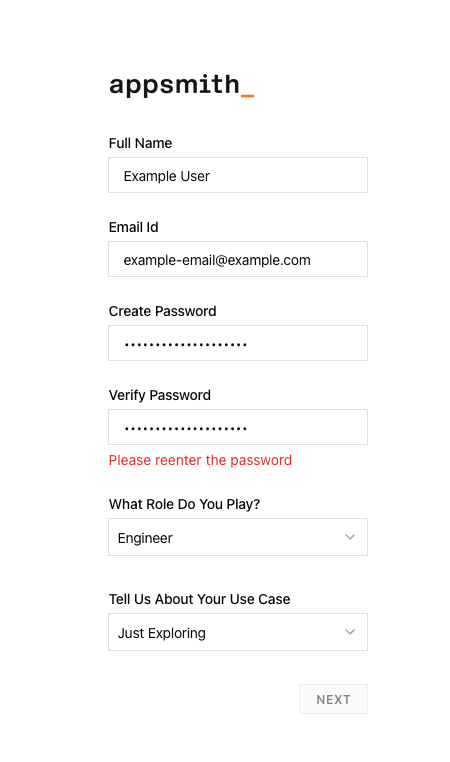
Proceeding from the welcome page, Appsmith prompts you to enter information for the current Appsmith user. This includes creation of a username (email address) and password, which are required for subsequent access to the Appsmith dashboard.

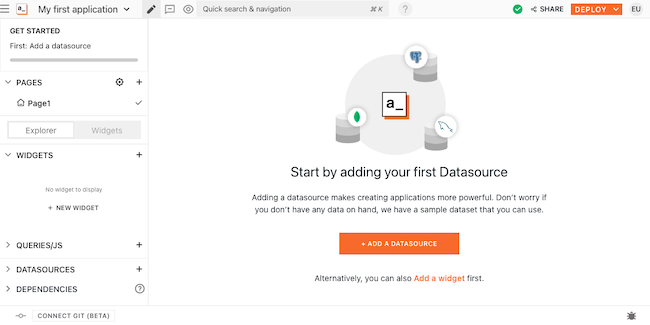
Following that, you arrive at the main Appsmith page. On your first visit, a prompt offers you the option of a tutorial, which you can access later as the Welcome Tour from the left menu. Otherwise, you can head right into the dashboard.
In addition to the built-in tutorial, Appsmith offers tutorials on its website. These can be especially useful when it comes to applying further setup and configuration changes to your Appsmith instance.
How to Configure Appsmith for Self-hosting
The main place for Appsmith configurations is stacks/configuration/docker.env within the Appsmith directory. There, you can set up things like an administrator username and password and API keys for integrations.
For instance, say that you want to use GitHub OAth, an email server, and a custom domain name for your Appsmith instance. You can do so by editing the following lines in the docker.env file, replacing the example values provided here:
- File: stacks/configuration/docker.env
 1
 2
 3
 4
 5
 6
 7
 8
 9
10
11
12
13
14
15
16
17
18
19
20
21
22
# [...] # Github OAuth APPSMITH_OAUTH2_GITHUB_CLIENT_ID=example_github_client_id APPSMITH_OAUTH2_GITHUB_CLIENT_SECRET=example_github_auth_secret # [...] # Email server APPSMITH_MAIL_ENABLED=true APPSMITH_MAIL_HOST=mail.example-domain.com APPSMITH_MAIL_PORT=25 APPSMITH_MAIL_USERNAME=example_appsmith_email_user APPSMITH_MAIL_PASSWORD=example_appsmith_user_password APPSMITH_MAIL_FROM=appsmith@mail.example-domain.com APPSMITH_REPLY_TO=appsmith@mail.example-domain.com # [...] APPSMITH_CUSTOM_DOMAIN=example-domain.com # [...]
You can learn more about particular configuration options in the official Appsmith configuration documentation.
Once you have made configuration changes, you need to restart the Appsmith services for those changes to take effect. You can use the following command to restart the services:
sudo docker compose restart appsmith
Configuring Automatic Updates
Setting up Appsmith for automatic updates requires a configuration change in a different file. For this change, you need to modify the docker-compose.yml file found in the Appsmith directory. Follow these steps to make the necessary changes and enable automatic updates.
Stop the Appsmith services:
sudo docker compose stopOpen the
docker-compose.ymlfile, and find the commented-out lines that begin with the line# Uncomment the lines below to enable auto-update. YAML configuration files like this one use#to comment out lines.Remove the comment syntax (
#) from the beginnings of these lines. There may be a space character preceding the#, which should also be removed. The section of your configuration file may afterward look something like:- File: docker-compose.yml
 1
 2
 3
 4
 5
 6
 7
 8
 9
10
11
12
# Uncomment the lines below to enable auto-update labels: com.centurylinklabs.watchtower.enable: "true" auto_update: image: containrrr/watchtower:latest-dev volumes: - /var/run/docker.sock:/var/run/docker.sock # Update check interval in seconds. command: --schedule "0 0 * ? * *" --label-enable --cleanup restart: unless-stopped
Start the Appsmith services back up. Docker Compose downloads the necessary additional image file and creates the service used to manage automatic updates:
sudo docker compose up -d
Alternatively, you can make manual updates to your Appsmith instance. Take a look at the section on Updating Appsmith below for the commands to do so.
How to Manage the Appsmith Instance
The next sections give you tools for managing your Appsmith instance. These can be helpful for keeping your instance up-to-date and for troubleshooting issues with any of the Appsmith services.
Monitoring Processes
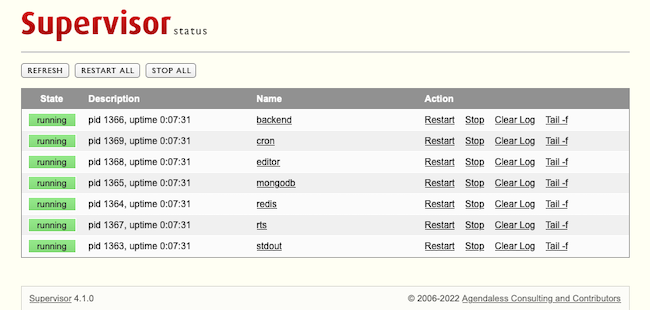
Appsmith has a dedicated web interface for monitoring Appsmith processes, called Supervisor.
You can access the Supervisor dashboard by navigating your browser to the Supervisor path, /supervisor. You can do this locally with http://localhost/supervisor. Or you can access the Supervisor remotely through your server’s domain/IP address. For example, if your server’s IP address is 192.0.2.0, you could find the Supervisor at 192.0.2.0/supervisor.
Appsmith uses particular credentials for accessing the Supervisor, and you need to provide these credentials each time you want to access it. The credentials are set and stored in the main configuration file discussed above, stacks/configuration/docker.env. The file comes with a default username and password (the password being randomly generated) that you can either use or change. It is recommended, however, that you change the default password:
- File: stacks/configuration/docker.env
1
2
3
4
# [...] APPSMITH_SUPERVISOR_USER=appsmith APPSMITH_SUPERVISOR_PASSWORD=default_supervisor_password # [...]
Updating Appsmith
You can update your Appsmith instance manually, if you have not enabled automatic updates. This requires you to issue a series of commands from the Appsmith directory:
sudo docker rmi appsmith/appsmith-ce -f
sudo docker pull appsmith/appsmith-ce
sudo docker rm -f appsmith
sudo docker run -d --name appsmith -p 80:80 -v "$PWD/stacks:/appsmith-stacks" appsmith/appsmith-ce
Alternatively, refer to the Configuring Automatic Updates section above for steps to enable automatic updates on your Appsmith instance.
Conclusion
Having followed this tutorial, you have what you need to start using Appsmith to build your own applications. This tutorial covers the steps and techniques for getting an Appsmith instance up-and-running, and managing it once you have.
From there, you can jump into the tutorials and guides available from Appsmith to learn all the possibilities the framework has to offer. Take a look at the link to Appsmith below, or at the links provided throughout this guide.
More Information
You may wish to consult the following resources for additional information on this topic. While these are provided in the hope that they will be useful, please note that we cannot vouch for the accuracy or timeliness of externally hosted materials.
This page was originally published on


