Product docs and API reference are now on Akamai TechDocs.
Search product docs.
Search for “” in product docs.
Search API reference.
Search for “” in API reference.
Search Results
results matching
results
No Results
Filters
Access PostgreSQL Database Remotely Using pgAdmin on Windows
Traducciones al EspañolEstamos traduciendo nuestros guías y tutoriales al Español. Es posible que usted esté viendo una traducción generada automáticamente. Estamos trabajando con traductores profesionales para verificar las traducciones de nuestro sitio web. Este proyecto es un trabajo en curso.



PgAdmin is a free, open-source PostgreSQL database administration GUI for Microsoft Windows, Mac OS X, and Linux systems. It offers database server information retrieval, development, testing, and ongoing maintenance. This guide will help you install pgAdmin on Windows, providing secure, remote access to PostgreSQL databases. It is assumed that you have already installed PostgreSQL on your Linode in accordance with our PostgreSQL installation guides.
Install pgAdmin
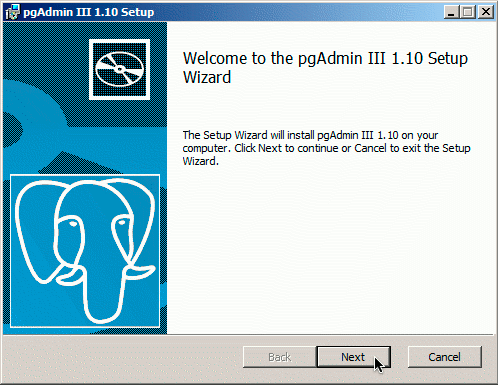
Visit the pgAdmin download page to obtain the most recent version of the program. Save the installer to your desktop and launch it. You’ll be greeted with the following screen; click “Next” to continue.
Read the license agreement and check the box below it to accept the terms. Click “Next” to continue.

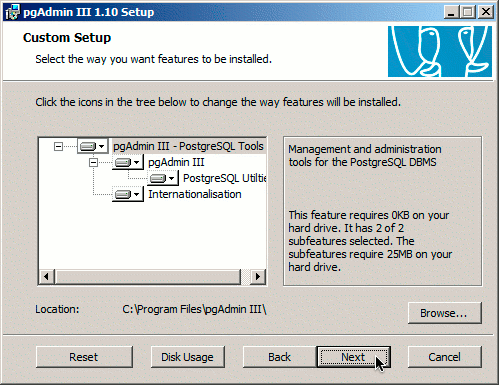
You will be prompted to specify which features you want to install. The default settings are recommended. Click “Next” to continue.
If you’re running Windows Vista or Windows 7, you may receive the following warning dialog. Click “Yes” to finish the installation.
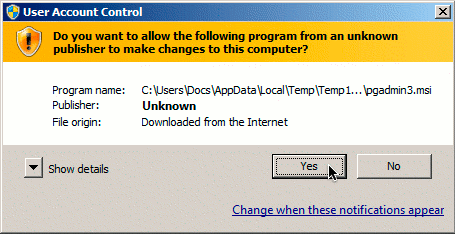
Next, you’ll configure an SSH tunnel to securely connect to your remote database server.
Configure SSH Tunnel
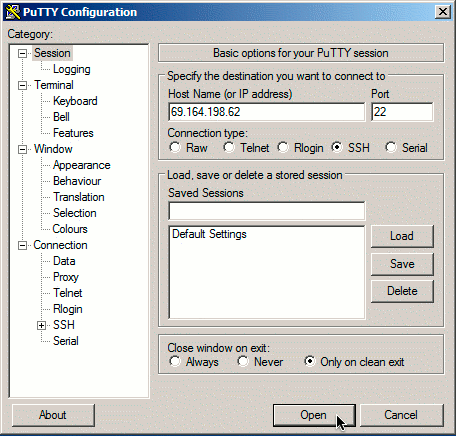
While PostgreSQL supports SSL connections, it is not advisable to instruct it to listen on public IP addresses unless absolutely necessary. For this reason, you’ll be using PuTTY (a free SSH client) to create a secure SSH tunnel to your Linode. Obtain the program by visiting the PuTTY download page. Save it to your desktop and launch it. You’ll be greeted with the “Session” dialog shown below; enter your Linode’s IP address or FQDN in the “Host Name” field.
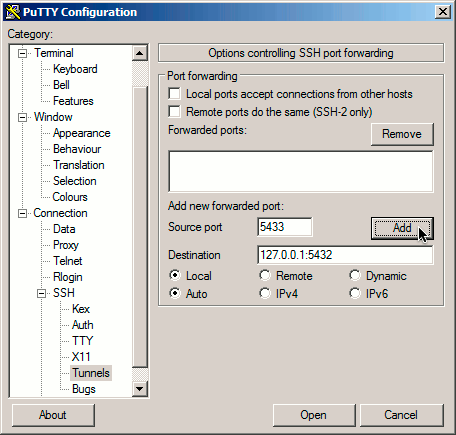
Open the “Connection -> SSH -> Tunnels” screen. Enter “5433” in the “Source port” field. Although PostgreSQL uses 5432 for TCP connections, you’ll want to specify 5433 as the port number in case you decide to install PostgreSQL locally later on. Enter “127.0.0.1:5432” in the “Destination” field, and click the “Add” button.
The “Forwarded ports” list should now contain an entry like the one shown below.
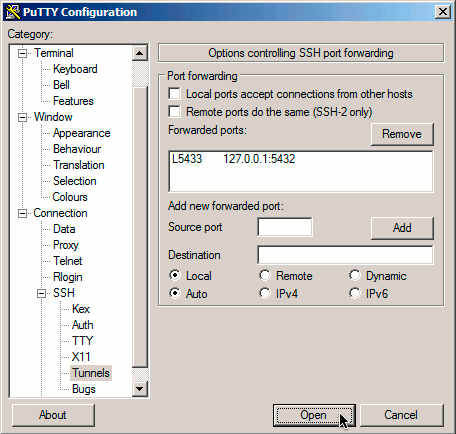
Click the “Open” button to start your connection. If you haven’t logged into your Linode with PuTTY before, you will receive a warning similar to the following:
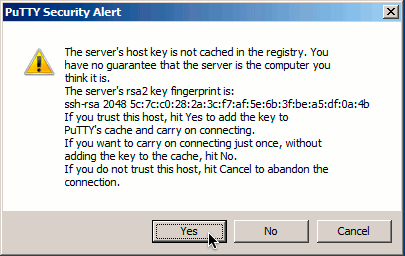
PuTTY is asking you to verify that the server you’re logging into is who it says it is. This is due to the possibility that someone could be eavesdropping on your connection and posing as the server you are trying to log into. You need some “out of band” method to compare the key fingerprint presented to PuTTY with the fingerprint of the public key on the server you wish to log into. You may do so by logging into your Linode via Lish and executing the following command:
ssh-keygen -l -f /etc/ssh/ssh_host_rsa_key.pub
If the fingerprints match, click “Yes” to accept the warning and cache this host key in the registry. You won’t receive further warnings unless the key presented to PuTTY changes for some reason; typically, this should only happen if you reinstall the remote server’s operating system. If you should receive this warning again from a system you already have the host key cached on, you should not trust the connection and investigate matters further.
You may log into your Linode with any user account you have configured on it. Next, you’ll use pgAdmin to connect to PostgreSQL through the tunnel.
Use pgAdmin
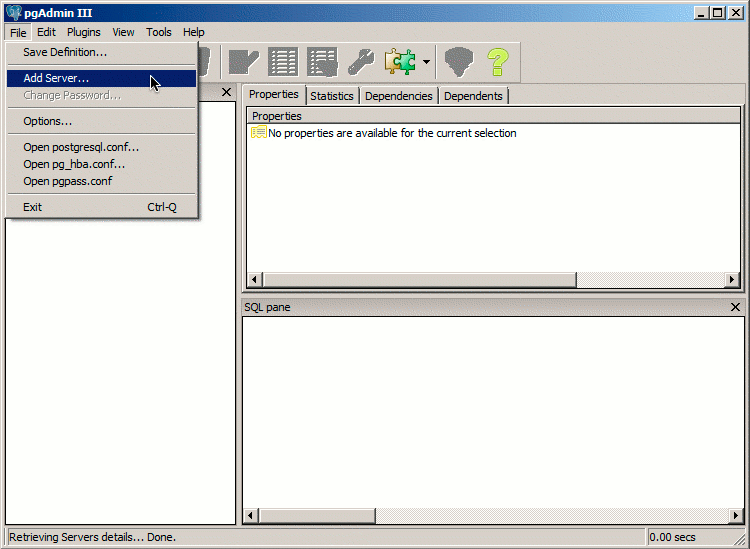
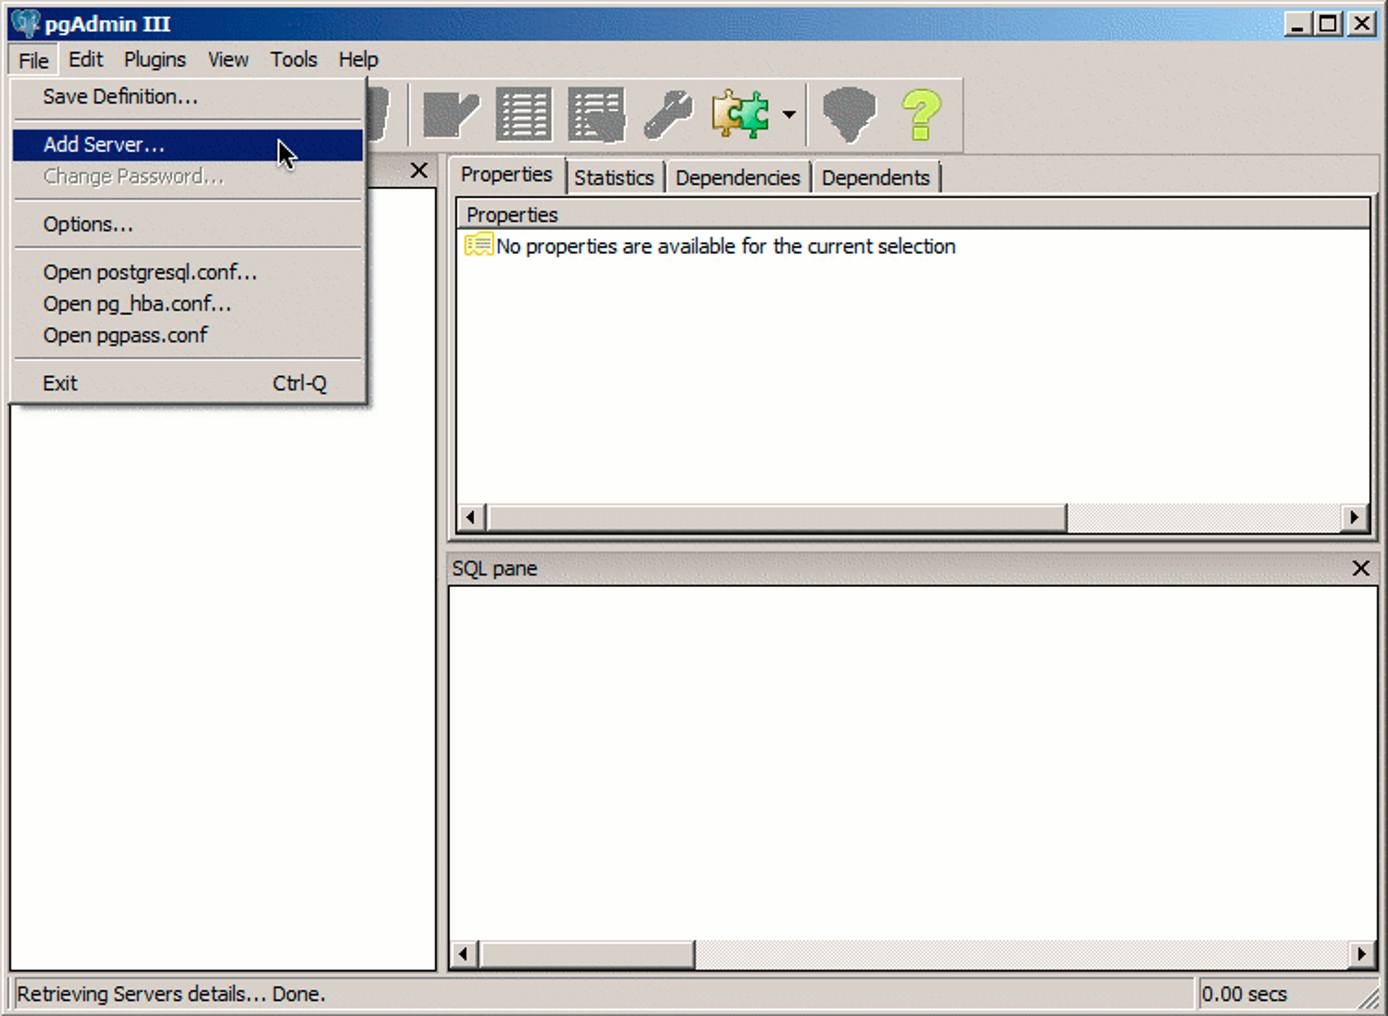
Launch pgAdmin and you’ll be presented with a default view containing no servers. Click “File -> Add Server” as shown below.


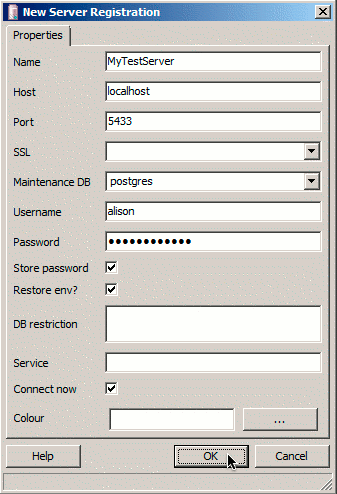
In the “New Server Registration” dialog that appears, enter appropriate values for your server name and PostgreSQL user credentials. Be sure to specify “localhost” for the “Host” field, as you’ll be connecting via your SSH tunnel. Click “OK” to connect to your server.
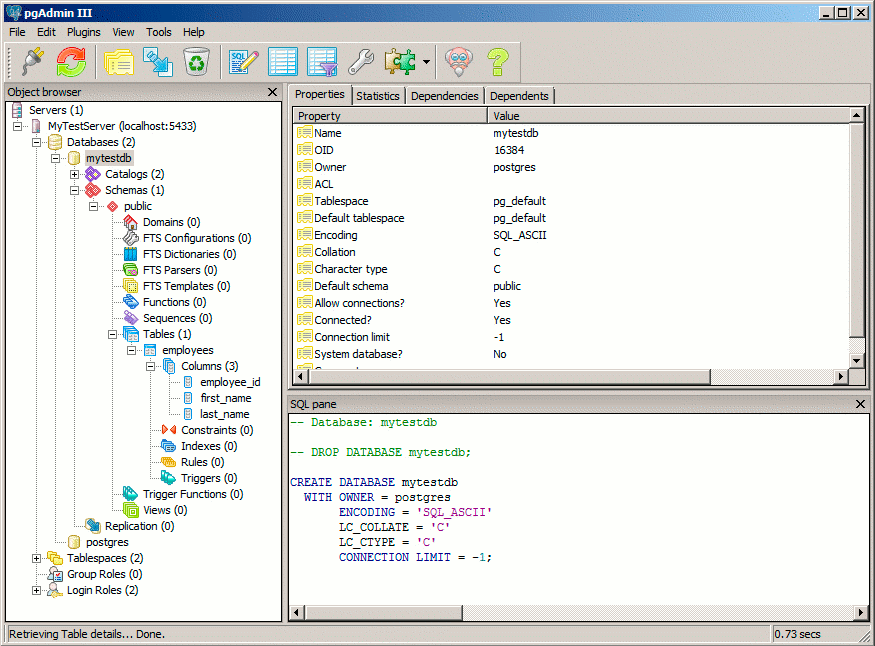
You will be presented with a full view of the databases that your user account has access to.

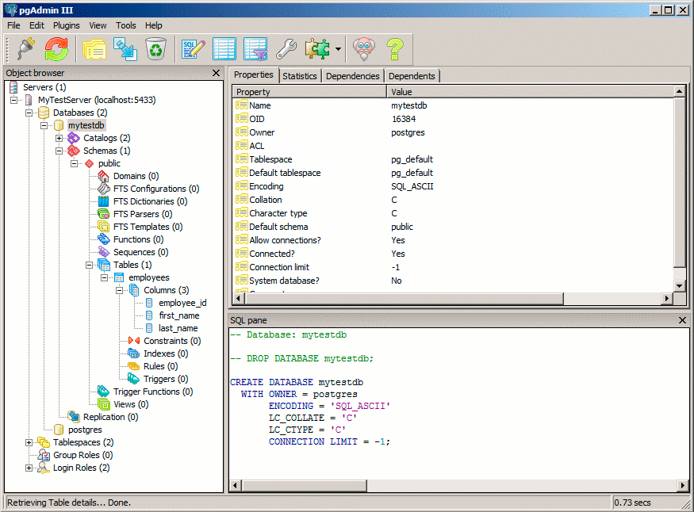
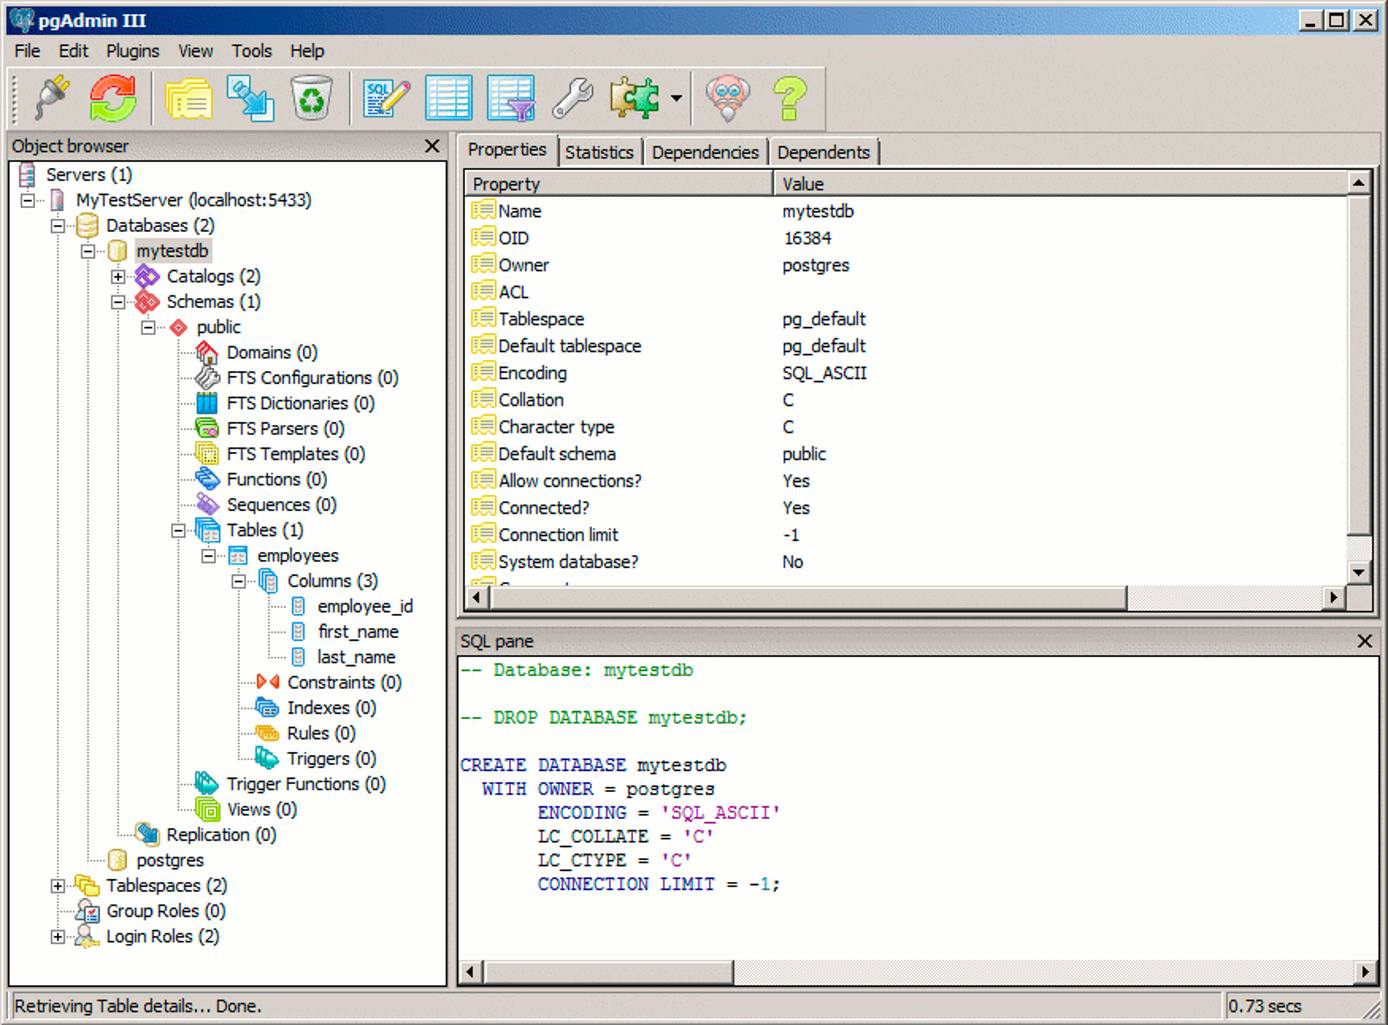
Congratulations! You’ve gained secure, remote access to your PostgreSQL server with pgAdmin III.
More Information
You may wish to consult the following resources for additional information on this topic. While these are provided in the hope that they will be useful, please note that we cannot vouch for the accuracy or timeliness of externally hosted materials.
This page was originally published on


