Product docs and API reference are now on Akamai TechDocs.
Search product docs.
Search for “” in product docs.
Search API reference.
Search for “” in API reference.
Search Results
results matching
results
No Results
Filters
Install a Chef Server Workstation on Ubuntu 14.04
Traducciones al EspañolEstamos traduciendo nuestros guías y tutoriales al Español. Es posible que usted esté viendo una traducción generada automáticamente. Estamos trabajando con traductores profesionales para verificar las traducciones de nuestro sitio web. Este proyecto es un trabajo en curso.
DeprecatedThis guide has been deprecated and is no longer being maintained. Please refer to the updated version of this guide.
Chef is an automation platform that “turns infrastructure into code,” allowing users to manage and deploy resources across multiple servers, or nodes. Chef allows users to create and download recipes (stored in cookbooks) to automate content and policies on these nodes.
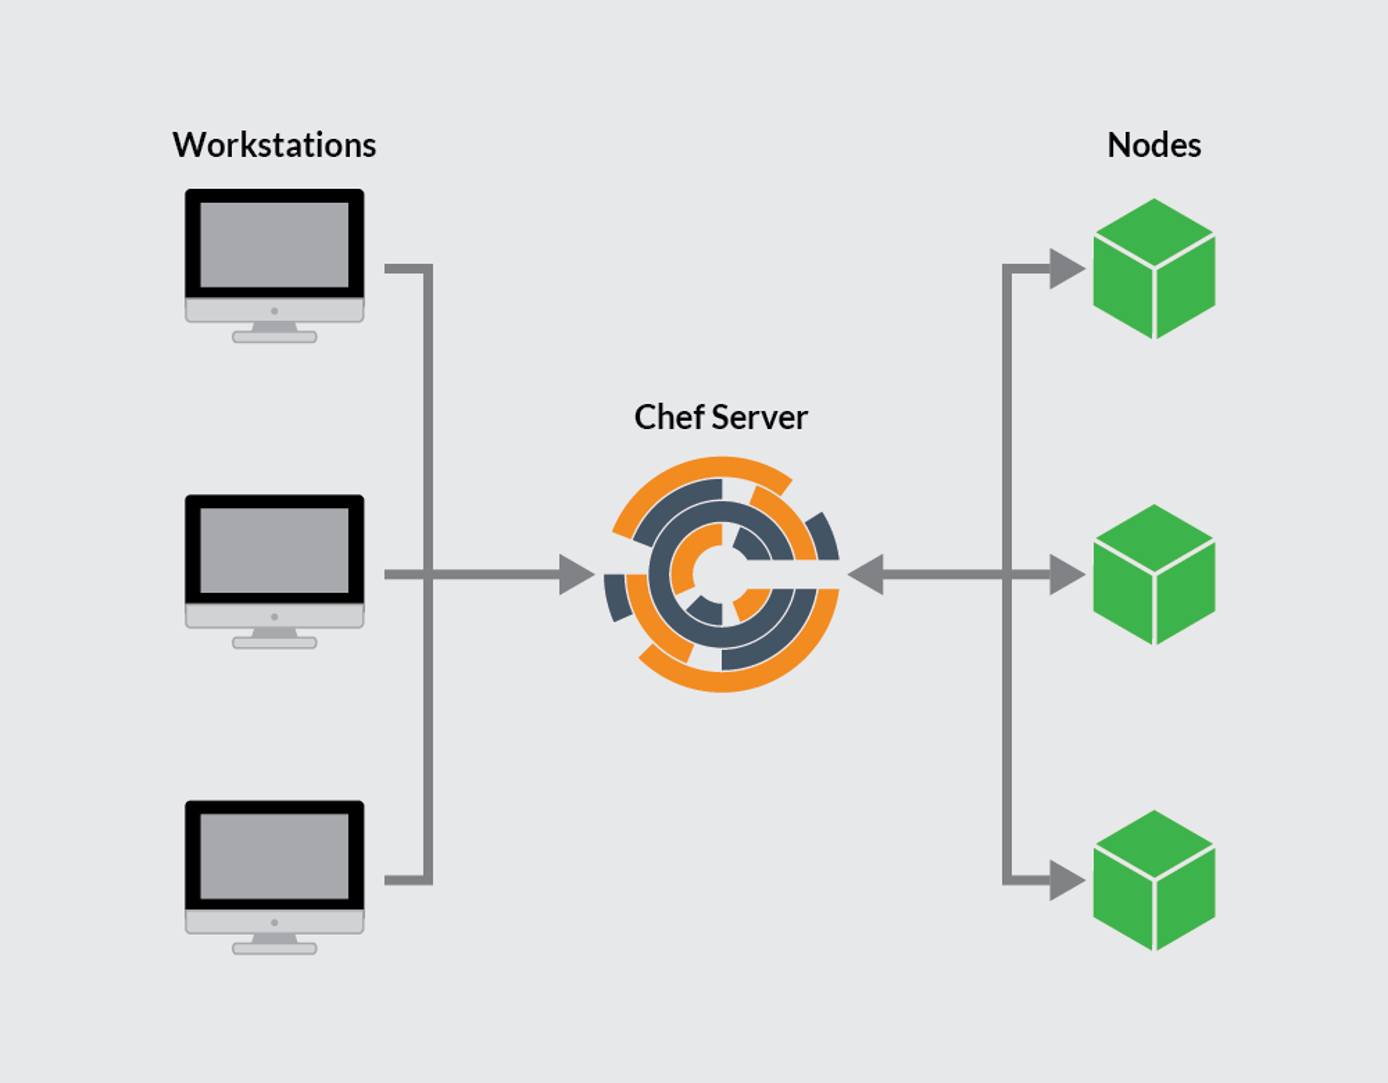
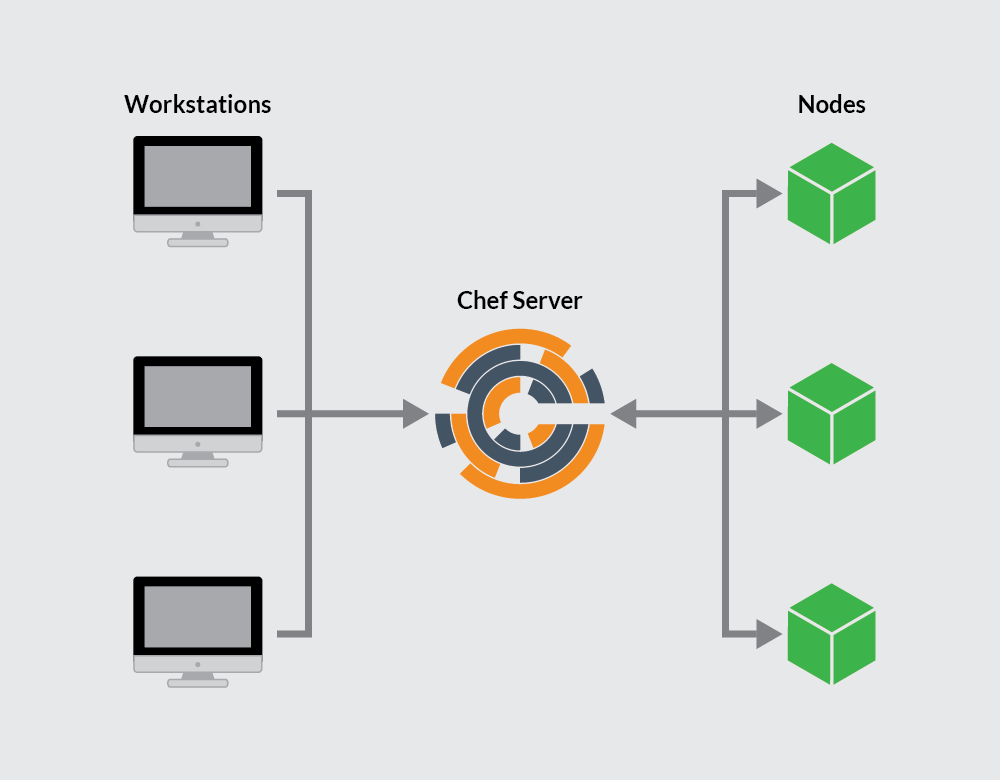
Chef is comprised of a Chef server, one or more workstations, and a number of nodes that are managed by the chef-client installed on each node.


This guide will show users how to create and configure a Chef server, a virtual workstation, and how to bootstrap a node to run the chef-client, all on individual Linodes.
sudo. If you’re not familiar with the sudo command, you can check our Users and Groups guide.Prerequisites
One 4GB Linode to host the Chef server, running Ubuntu 14.04
Two Linodes of any size to host a workstation and a node, each running Ubuntu 14.04
Each Linode should be configured by following the Setting Up and Securing a Compute Instance guide
Each Linode needs to be configured to have a valid FQDN
Ensure that all servers are up-to-date:
sudo apt-get update && sudo apt-get upgrade
The Chef Server
The Chef server is the hub of interaction between all workstations and nodes using Chef. Changes made through workstations are uploaded to the Chef server, which is then accessed by the chef-client and used to configure each individual node.
Install the Chef Server
Download the latest Chef server core (12.0.8 at the time of writing):
wget https://web-dl.packagecloud.io/chef/stable/packages/ubuntu/trusty/chef-server-core_12.0.8-1_amd64.debInstall the server:
sudo dpkg -i chef-server-core_*.debRemove the download file:
rm chef-server-core_*.debRun the
chef-server-ctlcommand to start the Chef server services:sudo chef-server-ctl reconfigure
Create a User and Organization
In order to link workstations and nodes to the Chef server, an administrator and an organization need to be created with associated RSA private keys. From the home directory, create a
.chefdirectory to store the keys:mkdir .chefCreate an administrator. Change
usernameto your desired username,firstnameandlastnameto your first and last name,emailto your email,passwordto a secure password, andusername.pemto your username followed by.pem:sudo chef-server-ctl user-create username firstname lastname email password --filename ~/.chef/username.pemCreate an organization. The
shortnamevalue should be a basic identifier for your organization with no spaces, whereas thefullnamecan be the full, proper name of the organization. Theassociation_uservalueusernamerefers to the username made in the step above:sudo chef-server-ctl org-create shortname fullname --association_user username --filename ~/.chef/shortname.pemWith the Chef server installed and the needed RSA keys generated, you can move on to configuring your workstation, where all major work will be performed for your Chef’s nodes.
Workstations
Your Chef workstation will be where you create and configure any recipes, cookbooks, attributes, and other changes made to your Chef configurations. Although this can be a local machine of any OS, there is some benefit to keeping a remote server as your workstation since it can be accessed from anywhere.
Setting Up a Workstation
Download the latest Chef Development Kit (0.5.1 at time of writing):
wget https://opscode-omnibus-packages.s3.amazonaws.com/ubuntu/12.04/x86_64/chefdk_0.5.1-1_amd64.debInstall ChefDK:
sudo dpkg -i chefdk_*.debRemove the install file:
rm chefdk_*.debVerify the components of the development kit:
chef verifyIt should output:
Running verification for component 'berkshelf'
Running verification for component 'test-kitchen'
Running verification for component 'chef-client'
Running verification for component 'chef-dk'
Running verification for component 'chefspec'
Running verification for component 'rubocop'
Running verification for component 'fauxhai'
Running verification for component 'knife-spork'
Running verification for component 'kitchen-vagrant'
Running verification for component 'package installation'
........................
---------------------------------------------
Verification of component 'rubocop' succeeded.
Verification of component 'kitchen-vagrant' succeeded.
Verification of component 'fauxhai' succeeded.
Verification of component 'berkshelf' succeeded.
Verification of component 'knife-spork' succeeded.
Verification of component 'test-kitchen' succeeded.
Verification of component 'chef-dk' succeeded.
Verification of component 'chef-client' succeeded.
Verification of component 'chefspec' succeeded.
Verification of component 'package installation' succeeded.
Generate the chef-repo and move into the newly-created directory:
chef generate repo chef-repo
cd chef-repo
Make the
.chefdirectory:mkdir .chef
Add the RSA Private Keys
The RSA private keys generated when setting up the Chef server will now need to be placed on the workstation. The process behind this will vary depending on if you are using SSH key pair authentication to log into your Linodes.
If you are not using key pair authentication, then copy the file directly off of the Chef Server. replace
userwith your username on the server, and123.45.67.89with the URL or IP of your Chef Server:scp user@123.45.67.89:~/.chef/*.pem ~/chef-repo/.chef/If you are using key pair authentication, then from your local terminal copy the .pem files from your server to your workstation using the
scpcommand. Replaceuserwith the appropriate username, and123.45.67.89with the URL or IP for your Chef Server and987.65.43.21with the URL or IP for your workstation:scp -3 user@123.45.67.89:~/.chef/*.pem user@987.65.43.21:~/chef-repo/.chef/
Confirm that the files have been copied successfully by listing the contents of the
.chefdirectory:ls ~/chef-repo/.chefYour
.pemfiles should be listed.
Add Version Control
The workstation is used to add and edit cookbooks and other configuration files. It is beneficial to implement some form of version control. For this, Git proves to be useful.
Download Git:
sudo apt-get install gitConfigure Git by adding your username and email, replacing the needed values:
git config --global user.name yourname
git config --global user.email user@email.com
From the chef-repo, initialize the repository:
git initAdd the
.chefdirectory to the.gitignorefile:echo ".chef" > .gitignoreAdd and commit all existing files:
git add .
git commit -m "initial commit"
Make sure the directory is clean:
git statusIt should output:
nothing to commit, working directory clean
Generate knife.rb
Create a knife configuration file by navigating to your
~/chef-repo/.cheffolder and opening a file namedknife.rbin your chosen text editor.Copy the following configuration into the
knife.rbfile:- File: ~/chef-repo/.chef/knife.rb
1
2
3
4
5
6
7
8
9
log_level :info log_location STDOUT node_name 'username' client_key '~/chef-repo/.chef/username.pem' validation_client_name 'shortname-validator' validation_key '~/chef-repo/.chef/shortname.pem' chef_server_url 'https://123.45.67.89/organizations/shortname' syntax_check_cache_path '~/chef-repo/.chef/syntax_check_cache' cookbook_path [ '~/chef-repo/cookbooks' ]
Change the following:
- The value for
node_nameshould be the username that was created above. - Change
username.pemunderclient_keyto reflect your.pemfile for your user. - The
validation_client_nameshould be your organization’sshortnamefollowed by-validator. shortname.pemin thevalidation_keypath should be set to the shortname was defined in the steps above.- Finally the
chef_server-urlneeds to contain the IP address or URL of your Chef server, with theshortnamein the file path changed to the shortname defined above.
- The value for
Move to the
chef-repoand copy the needed SSL certificates from the server:cd .. knife ssl fetchConfirm that
knife.rbis set up correctly by running the client list:knife client listThis command should output the validator name.
With both the server and a workstation configured, it is possible to bootstrap your first node.
Bootstrap a Node
Bootstrapping a node installs the chef-client and validates the node, allowing it to read from the Chef server and make any needed configuration changes picked up by the chef-client in the future.
From your workstation, bootstrap the node either by using the node’s root user, or a user with elevated privileges:
As the node’s root user, changing
passwordto your root password andnodenameto the desired name for your node. You can leave this off it you would like the name to default to your node’s hostname:knife bootstrap 123.45.67.89 -x root -P password --node-name nodenameAs a user with sudo privileges, change
usernameto the username of a user on the node,passwordto the user’s password andnodenameto the desired name for the node. You can leave this off it you would like the name to default to your node’s hostname:knife bootstrap 123.45.67.89 -x username -P password --sudo --node-name nodename
Confirm that the node has been bootstrapped by listing the nodes:
knife node listYour new node should be included on the list.
Download a Cookbook (Optional)
When using Chef you will want the chef-client to periodically run on your nodes and pull in any changes pushed to the Chef server. You will also want the validation.pem file that is uploaded to your node upon bootstrap to be deleted for security purposes. While these things can be done manually, it is often easier and more efficient to set it up as a cookbook.
This section is optional, but provides instructions on downloading a cookbook to your workstation, pushing it to a server, and includes the skeleton of a basic cookbook to expand and experiment with.
From your workstation download the cookbook and dependencies:
knife cookbook site install cron-delvalidateOpen the
default.rbfile to examine the default cookbook recipe:- File: ~/chef-repo/cookbooks/cron-delvalidate/recipies/default.rb
 1
 2
 3
 4
 5
 6
 7
 8
 9
10
11
12
13
14
15
16
# # Cookbook Name:: cron-delvalidate # Recipe:: Chef-Client Cron & Delete Validation.pem # # cron "clientrun" do minute '0' hour '*/1' command "/usr/bin/chef-client" action :create end file "/etc/chef/validation.pem" do action :delete end
The resource
cron "clientrun" dodefines the cron action. It is set to run the chef-client action (/usr/bin/chef-client) every hour (*/1with the*/defining that it’s every hour and not 1AM daily). Theactioncode denotes that Chef is creating a new cronjob.file "/etc/chef/validation.pem" docalls to thevalidation.pemfile. Theactiondefines that the file should be removed (:delete).These are two very basic sets of code in Ruby, and provide an example of the code structure that will be used when creating Chef cookbooks. These examples can be edited and expanded as needed.
Add the recipe to your node’s run list, replacing
nodenamewith your node’s name:knife node run_list add nodename 'recipe[cron-delvalidate::default]'Push the cookbook to the Chef server:
knife cookbook upload cron-delvalidateThis command is also used when updating cookbooks.
Switch to your bootstrapped node(s) and run the initial chef-client command:
chef-clientIf running the node as a non-root user, append the above command with
sudo.The recipes in the run list will be pulled from the server and run. In this instance, it will be the
cron-delvalidaterecipe. This recipe ensures that any cookbooks made, pushed to the Chef Server, and added to the node’s run list will be pulled down to bootstrapped nodes once an hour. This automated step eliminates connecting to the node in the future to pull down changes.
More Information
You may wish to consult the following resources for additional information on this topic. While these are provided in the hope that they will be useful, please note that we cannot vouch for the accuracy or timeliness of externally hosted materials.
This page was originally published on


